
This post was originally published on the Percy blog on April 17, 2019.
Last week we joined Mike Fotinakis of Percy and hundreds of attendees from around the world for a live webinar to talk about the power of using end-to-end functional and visual testing
together.
The webinar discussion, demo, and feedback were fantastic, so we wanted to follow up with a recap post. You can watch the webinar recording below, go through the slides, or read through this post to get a play-by-play of the webinar demo. The source code is available at https://github.com/cypress-io/angular-pizza-creator.
Testing an app’s functionality with Cypress
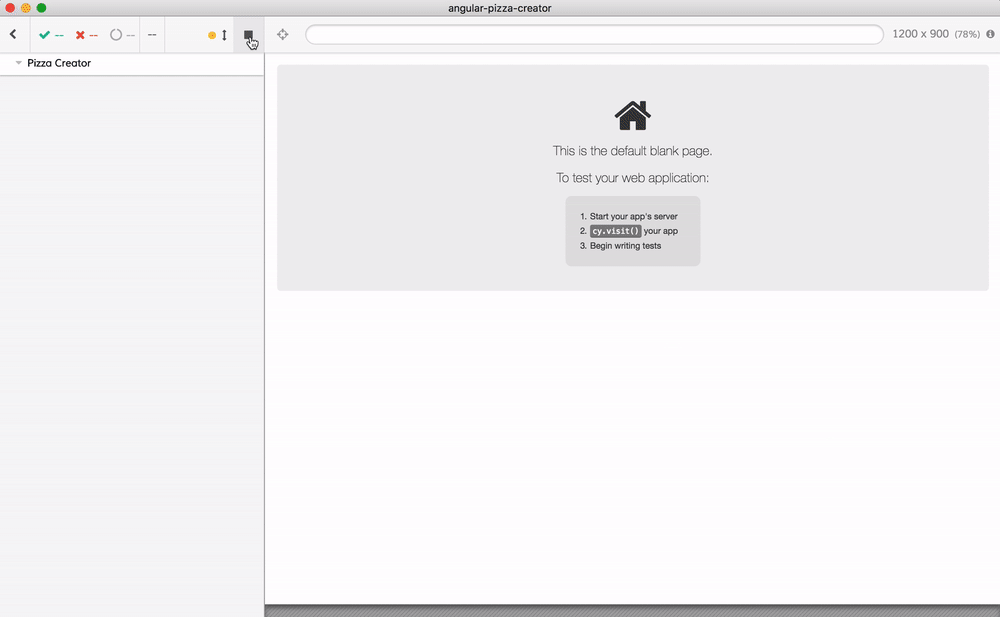
We used a fun Angular pizza ordering web app 🍕to demonstrate how functional testing with Cypress works. Cypress provides “fast, easy and reliable
testing for anything that runs in a browser.” It doesn’t matter what web framework it is — with Cypress all that matters is that it works.
To get started, simply install Cypress:
npm install -D cypress
Next, write some tests to make sure that we can enter delivery details, add the toppings we want, and successfully place an order. Here are some example Cypress tests that will help us do that:
/// <reference types="Cypress" />
context('Pizza Creator', () => {
  beforeEach(() => {
    // uses base url setting from cypress.json
    // which right now points at "localhost:3000"
    cy.visit('/')
  })

  it('orders custom pizza', function () {
    // enter delivery information
    cy.get('[formcontrolname="name"]').type('Joe')
    cy.get('[formcontrolname="email"]').type('foo@bar.com')
    cy.get('[formcontrolname="confirm"]').type('foo@bar.com')

    // without complete delivery information,
    // we should not be able to place the order
    cy.get('button[type="submit"]').should('be.disabled')

    cy.get('[formcontrolname="address"]').type('1 Pizza st')
    cy.get('[formcontrolname="postcode"]').type('12345')
    cy.get('[formcontrolname="phone"]').type('1234567890')

    // still cannot order pizza - need to pick toppings
    cy.get('button[type="submit"]').should('be.disabled')

    // add a few toppings
    cy.contains('label.pizza-topping', 'Pepperoni').click()
    cy.contains('label.pizza-topping', 'Onion').click()
    cy.contains('label.pizza-topping', 'Mozzarella').click()
    cy.contains('label.pizza-topping', 'Basil').click()

    // check the price and order pizza
    cy.contains('.pizza-summary__total-price', 'Total: $12.75')

    // let us confirm we can place our order,
    // but first, prepare for "window.alert" call
    cy.on('window:alert', cy.stub().as('alert'))

    // now the button should be enabled
    cy.get('button[type="submit"]')
      .should('be.enabled')
      .click()
    cy.get('@alert').should('have.been.calledWithExactly', 'Order placed')

    // scroll pizza view back into view
    cy.get('form')
      .scrollIntoView({})
      .should('be.visible')
  })
})
Reading through those tests, you can see that we’re checking to see that we can place an order only if all details are present and at least one topping is selected (sorry cheese lovers). We’re also testing to see that when some toppings are added, the price is generated, and when everything’s ready, we can place an order. 😋
If we plan to write more comprehensive tests, entering delivery info and picking toppings will quickly lead to lots of duplicate test code. With Cypress, you can factor them out to custom commands—hear more at 6:52 in the webinar recording.
For example, instead of using:
cy.get('[formcontrolname="name"]').type('Joe')
you can use:
cy.enterform('name','Joe')
All custom commands go into your cypress/support/index.js file, and make your tests more readable. Here are our simplified tests:
it('orders custom pizza', function () {
  cy.enterDeliveryInformation()
  cy.pickToppings('Pepperoni', 'Onion', 'Mozzarella', 'Basil')

  // check the price and order pizza
  cy.contains('.pizza-summary__total-price', 'Total: $12.75')

  // let us confirm we can place our order,
  // but first, prepare for "window.alert" call
  cy.on('window:alert', cy.stub().as('alert'))

  // now the button should be enabled
  cy.get('button[type="submit"]')
    .should('be.enabled')
    .click()
  cy.get('@alert').should('have.been.calledWithExactly', 'Order placed')

  // scroll pizza view back into view
  cy.get('form')
    .scrollIntoView({})
    .should('be.visible')
})
And this is what it looks like when they run:
Now that we’ve demonstrated how to ensure that your app is functioning as expected, let’s talk about a different kind of change.
Testing an app for visual changes
How do we catch a purely visual change like a color change?
Developers often try to solve this problem by extending their functional test suites with very specific regression tests. As you can imagine, these can become unruly very fast. For example, in this example from a real-world test suite, it became common to write some pretty fragile tests:

If you start writing assertions that UI elements don’t exist, or that a class is not applied, you know things are going down the wrong road. Visual testing eliminates the need to write these kinds of brittle and unmaintainable tests, giving you an automated process of detecting and reviewing visual UI changes.
The core of how this works is visual diffs.
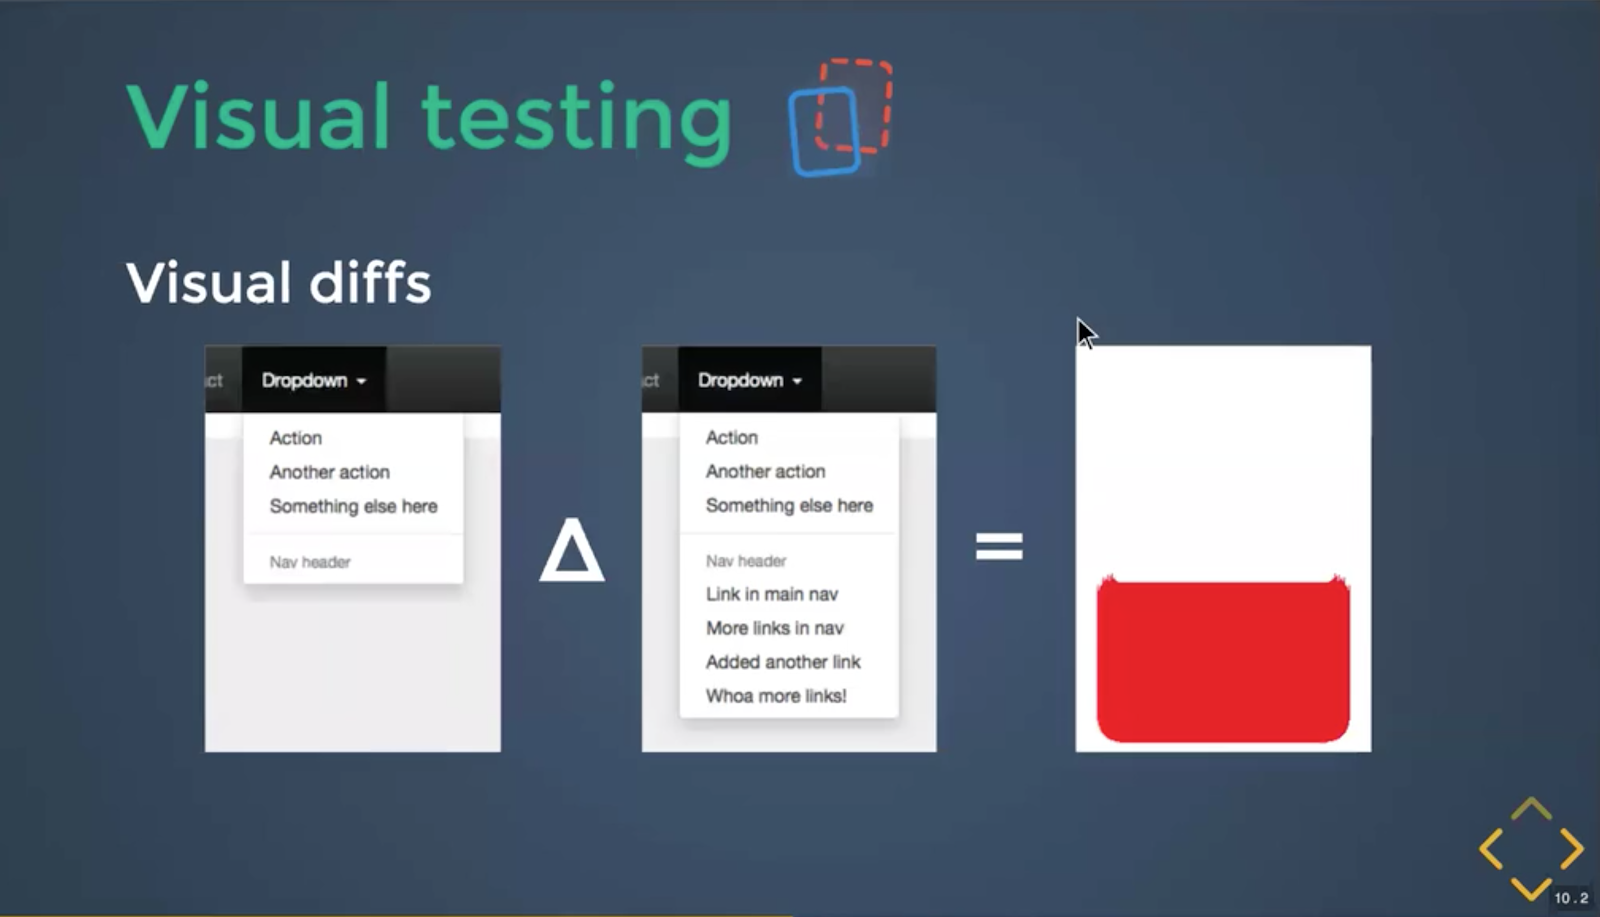
Diffs highlight the changed pixels in web applications, components, or static sites. By looking at the pixels instead of the code underneath, you can:
- Catch visual regressions before they reach your users
- Write smaller, more effective tests
- Delete/refactor CSS, layouts, and designs without fear
- Make dependency upgrades safely
- Test visualizations easily
- Reach continuous deployment
Visual testing also comes with a set of unique challenges—hear about some of
them at 18:21.
Let’s jump into how it works with Cypress. You can also follow along with Percy’s documentation to integrate, configure, and get started with Percy for Cypress.
Start by installing Percy:
npm install -D @percy/cypress
Next, import the Percy snapshot custom command into cypress/support/index.js :
import '@percy/cypress'
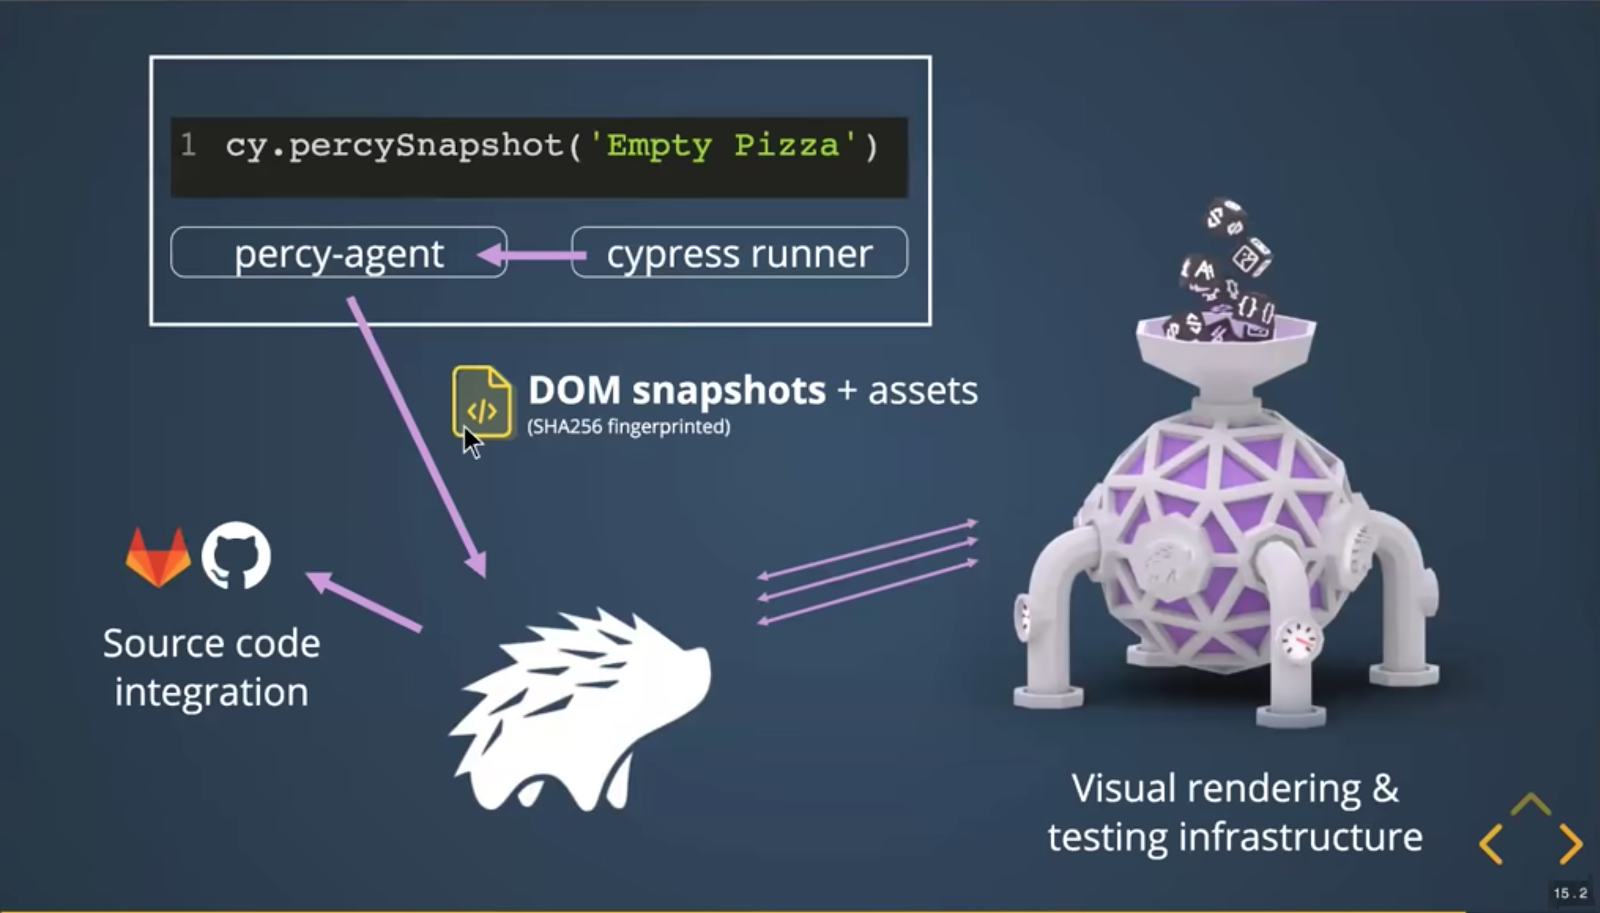
Then start adding that command, cy.percySnapshot('<name>'), to your Cypress tests.
You can choose where you want visual coverage in your test suite by adding that single line. Here’s an example:
it('draws pizza correctly', function () {
  cy.percySnapshot('Empty Pizza')

  cy.enterDeliveryInformation()
  const toppings = ['Pepperoni', 'Chili', 'Onion']
  cy.pickToppings(...toppings)

  // make sure the web app has updated
  cy.contains('.pizza-summary__total-price', 'Total: $12.06')
  cy.percySnapshot(toppings.join(' - '))

  // scroll pizza view back into view
  cy.get('form')
    .scrollIntoView({})
    .should('be.visible')
})
In those tests, we added snapshots of the empty pizza, and snapshots of the pizza once we’ve added the toppings. Later in the webinar (35:30), we talked about the anatomy of cy.percySnapshot(); how to set snapshot-specific responsive widths to render.
Setting up Percy with CI
To review those snapshots, you can configure your local environment, or to get the full value of the visual review workflow, add Percy to your CI service. We used CircleCI for this webinar. See how we set it up at 24:07 in the recording.
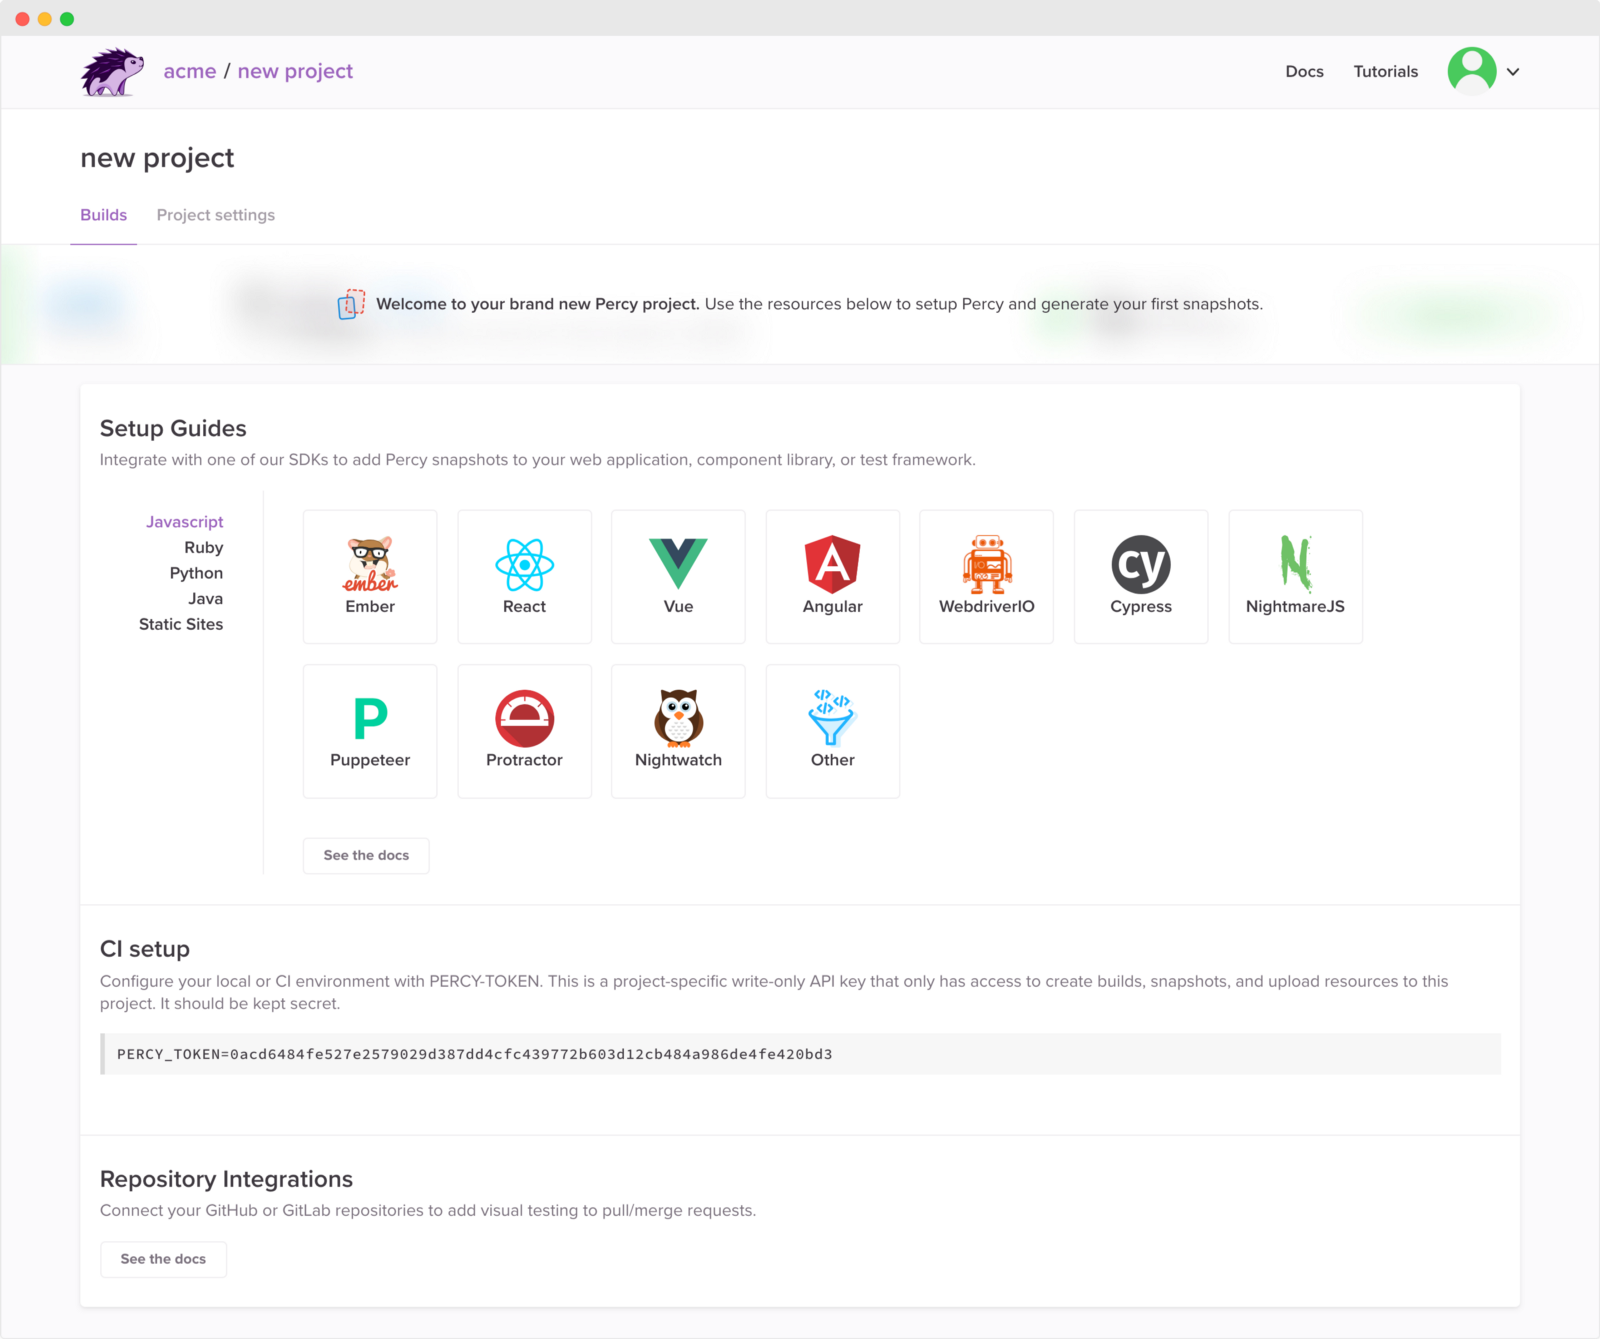
First, sign up for a free Percy account, create an organization and a new project to find your project-specific PERCY_TOKEN.
Add PERCY_TOKEN to your CI environment variables, and wrap your test suite with percy exec -- :
instead of:
npx cypress run
wrap with percy exec:
npx percy exec -- cypress run
You can check out the CircleCI project used for this webinar, or read the CI setup documentation.
Add to a GitHub repository
The next step is setting up a Percy source code integration. For this webinar, we integrated with GitHub and linked our repo and Percy project.
Now that Percy is fully integrated with our workflow, we’re ready to make a pull request with visual changes. Take a look at this one, where we changed the crust from a nice natural yellow to a not-so-appetizing green. 🤢
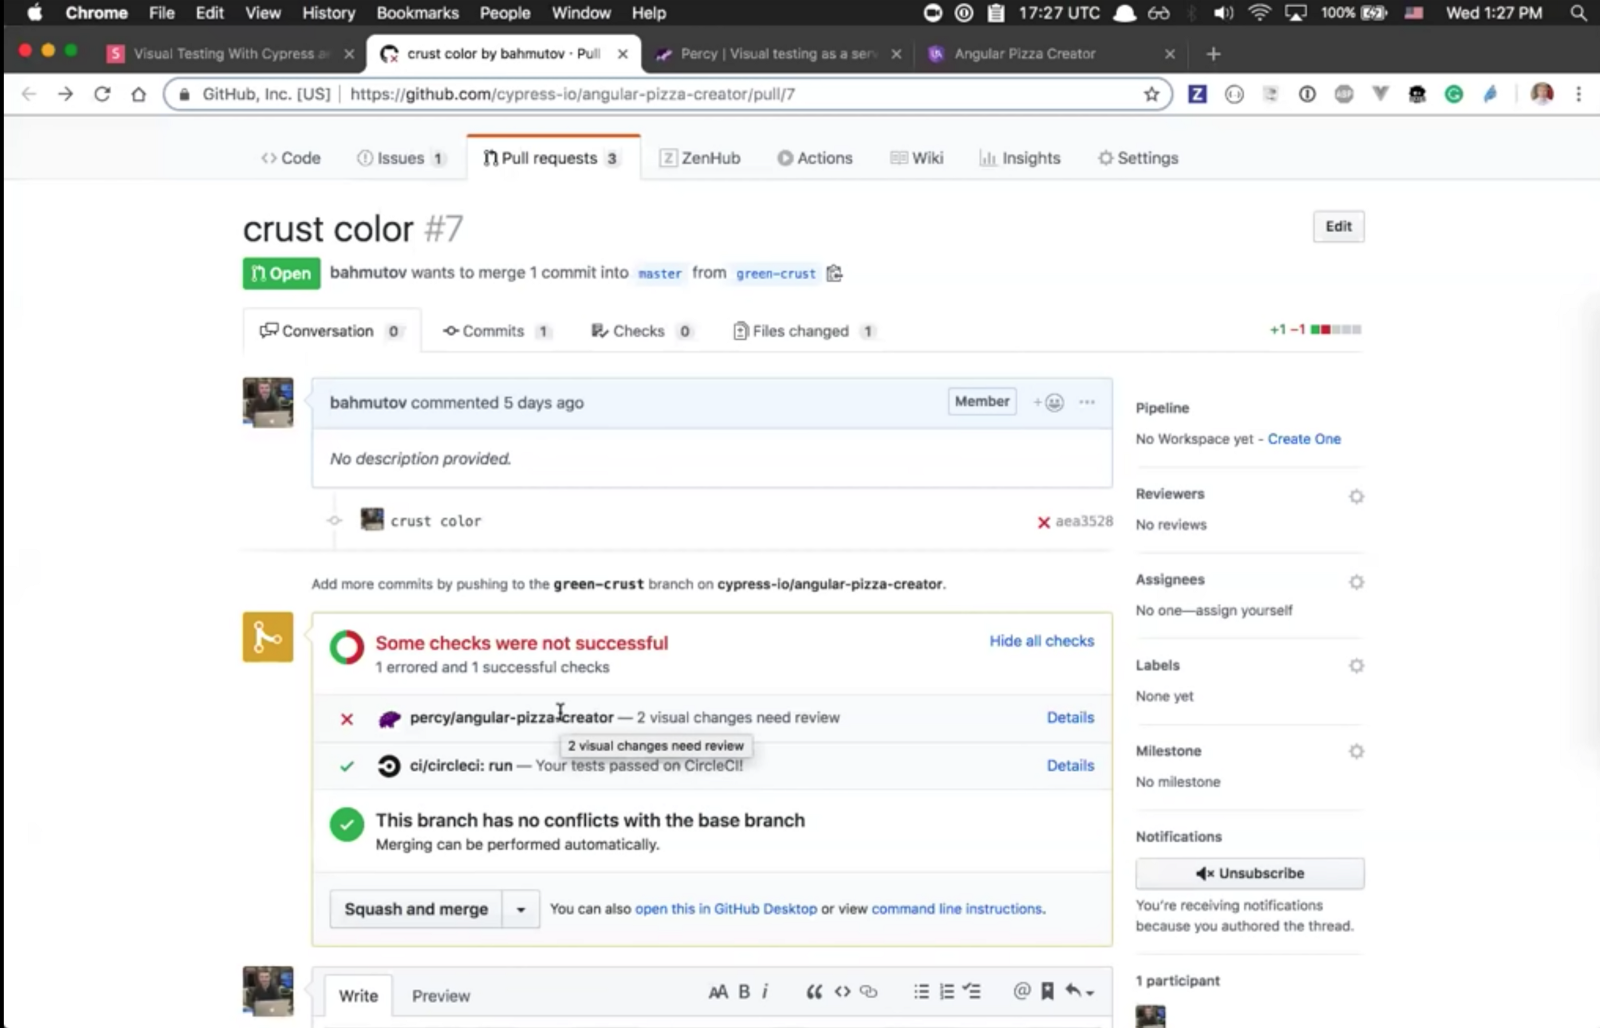
You can see that the CircleCI builds passed because the app still works as intended, but the visual tests did not — 2 visual changes were detected that need to be reviewed. Clicking the ‘Details’ takes you right to Percy where you can review all changes.
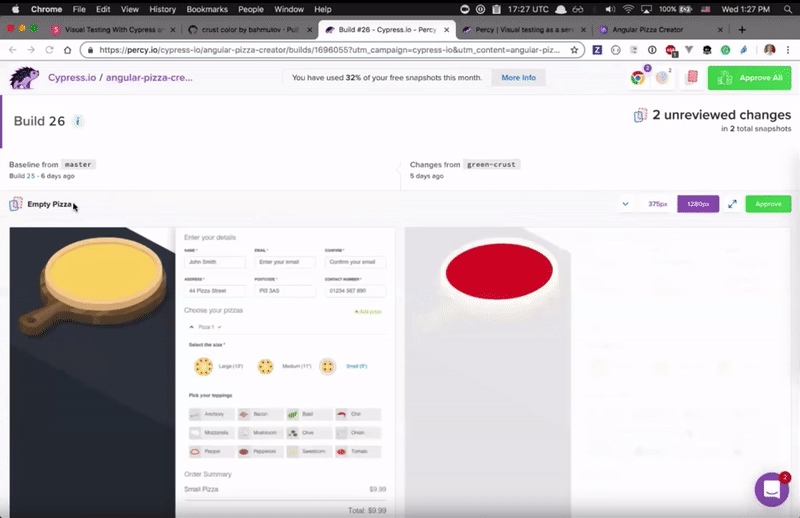
The Percy UI shows a side-by-side comparison between the master baseline and the new snapshot from our green-crust pull request. The red area in the right panel highlights the pixels that have changed, overlaid on top of the snapshot itself. Click to toggle between the two.
You can also see in the top right-hand side that the pages are rendered across different responsive breakpoints and across both Chrome and Firefox.
No, Cypress hasn’t launched support for Firefox, but because Percy captures the DOM state within your Cypress tests, we recreate the page in our own rendering infrastructure.
Approving snapshots
We decided that this green isn’t so bad and approve those snapshots, which in turn changes our commit status to passing. ✅
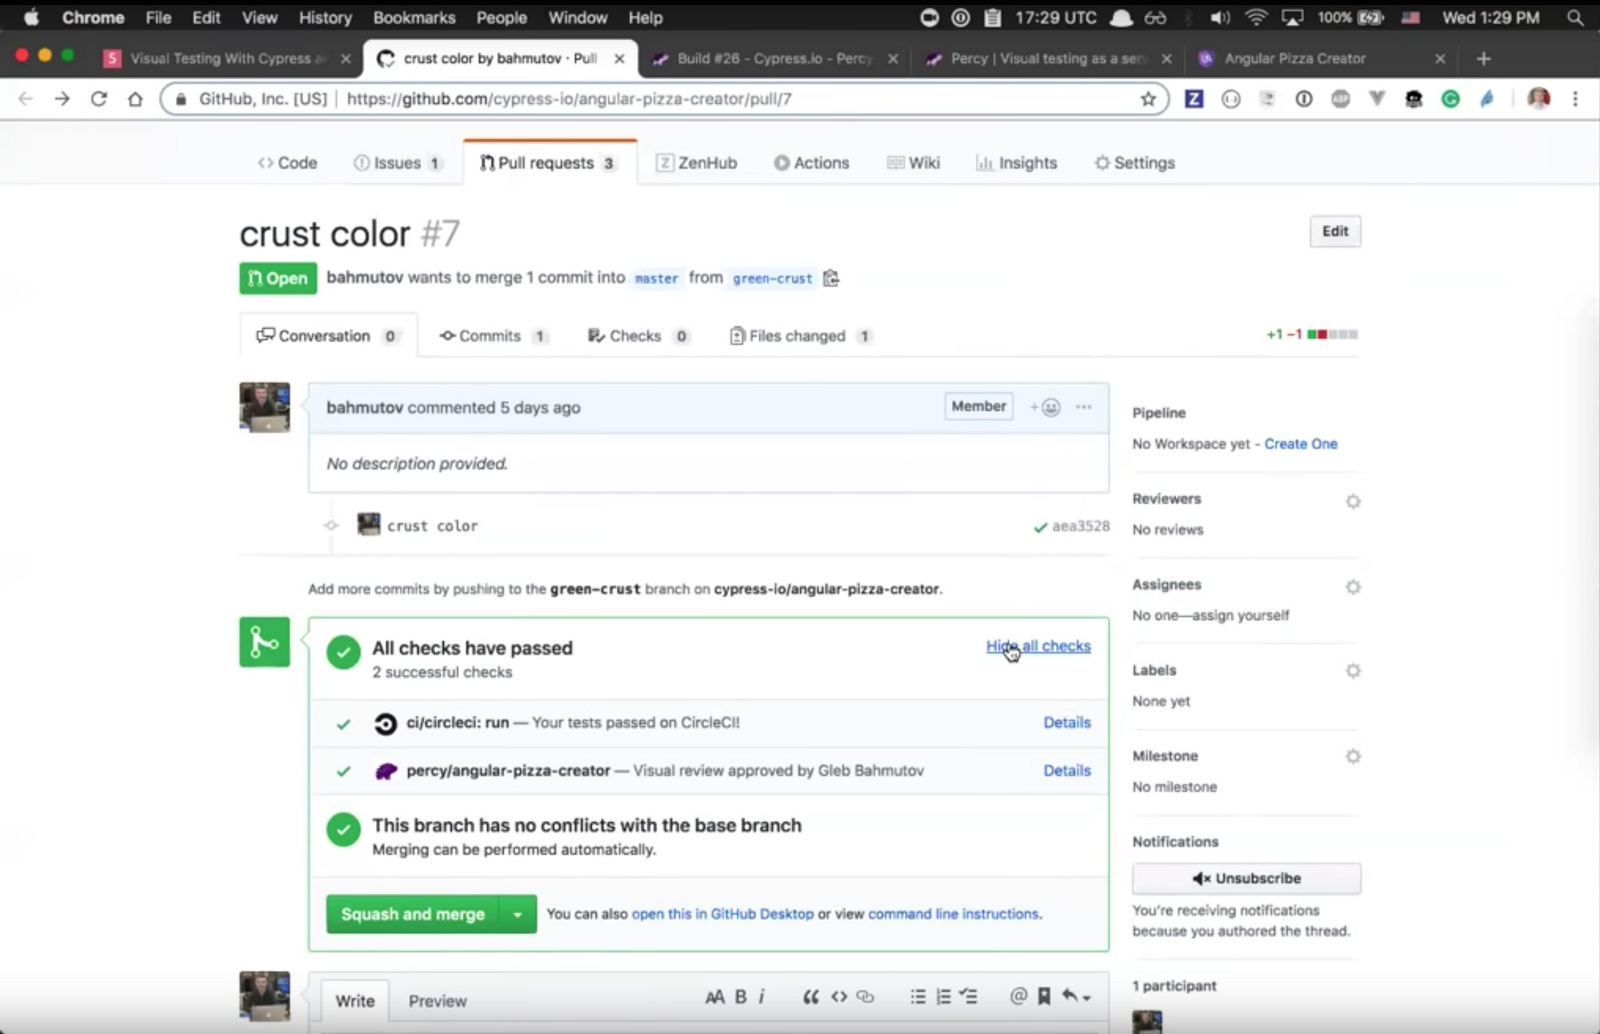
That’s it! You’re ready to merge and deploy with confidence.
With this workflow, it’s easy to do visual reviews without pulling up a local branch or a staging server — you can go right from your pull request during a code review and see all visual changes. Percy’s rendering infrastructure, testing platform, and built-in review processes make it easy to do this
continuously, and at scale on every single commit.
Tune in to the webinar at 30:21 to learn more about how Percy works under the hood, the anatomy of a snapshot, and tips for consistent rendering.