

Note: This post was written by Zach Rattner, CTO & Co-Founder of Yembo, the leader in AI-powered virtual inspections.
The problem
Yembo is the global leader in AI-powered, virtual home surveys. Our product contains a web app where clients scan quick videos of the items in their home, and our computer vision algorithms analyze the videos and identify the items that are present.
Our clients are moving companies and property insurance companies, and bringing AI into these inspections is novel in these industries. Naturally, we are frequently asked how to take videos in a way that maximizes AI performance. While there are many layers of algorithms and techniques that go into a production-grade vision pipeline and no one-size-fits-all solutions, there are some general guidelines we have discovered.
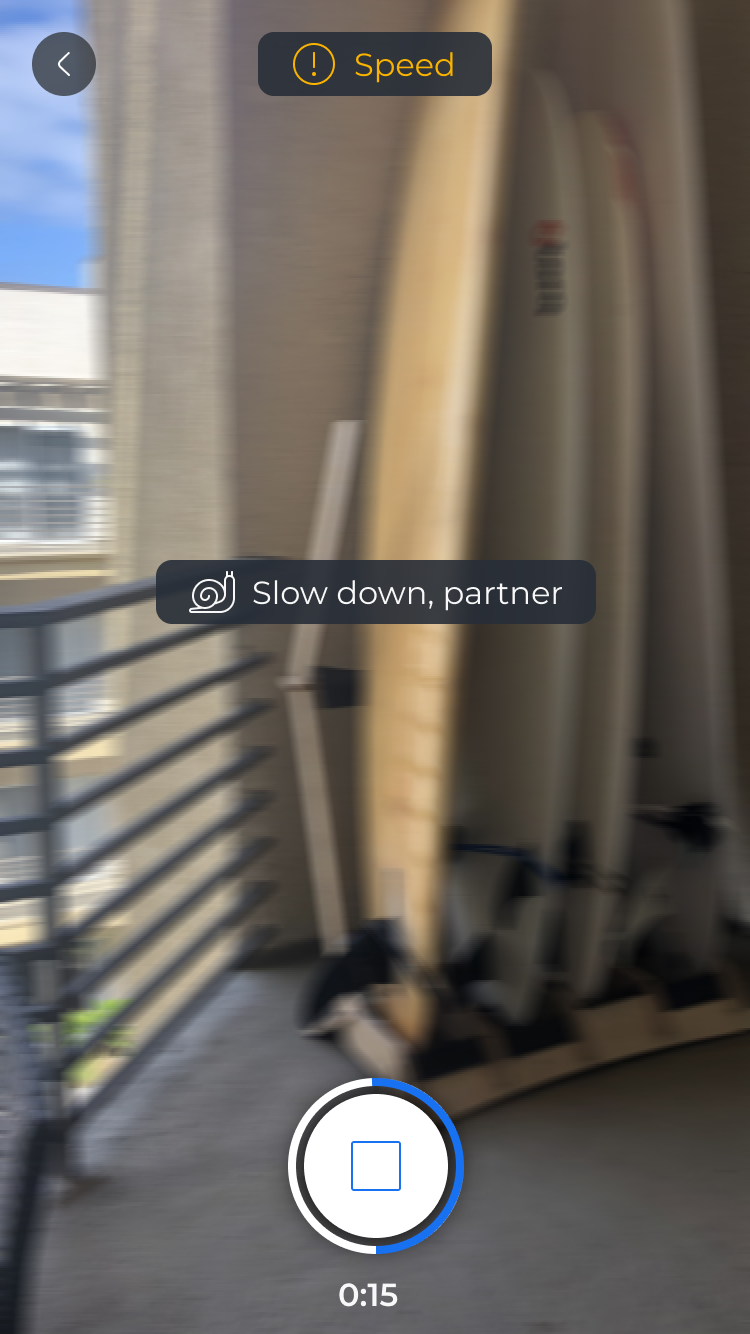
Maximizing the quality of the resulting analysis is one area where we saw an opportunity for UI features to enable the AI for success. While there are some impressive techniques that can be used to deblur and analyze low-quality images, it's much easier if the videos captured are of high quality. As a rule of thumb, if a video would be difficult for a human to watch and ascertain what's going on inside of it, it'll be challenging for AI to do the same. So it's advantageous to guide the user to take a good quality video.

In our studies, we found real-time tips can aid the user to record a high quality video. The user gains confidence when they are recording an ideal manner, and tips are shown when opportunities for improvement are detected.
Since this processing needs to happen in real time, we decided cloud-based solutions were too unreliable, network connectivity might be spotty while the user is recording. On the flip side, phones have comparatively less compute power, so a lightweight approach is needed.
Monitoring device motion
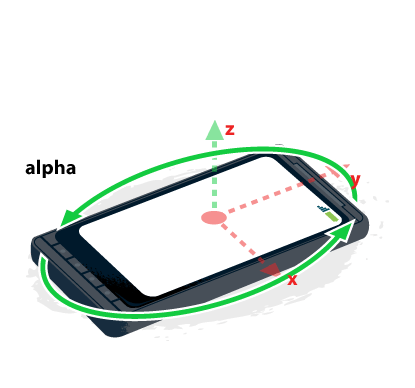
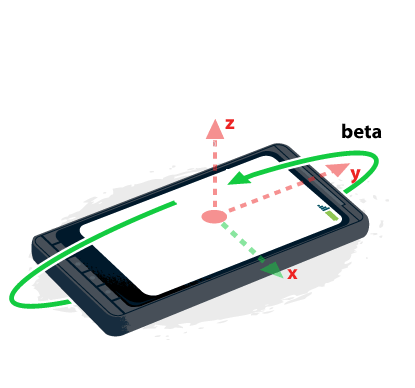
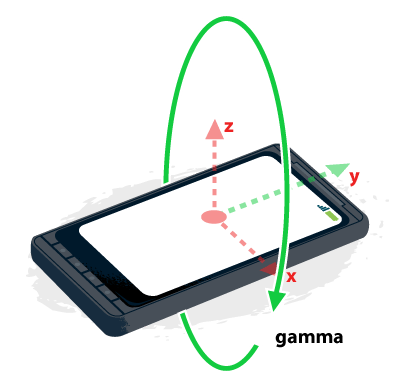
One approach we employ is to monitor the motion of the device while the recording is in progress. We can accomplish this via monitoring the device's accelerometer and gyroscope. In case it's been a while since you took high school physics, acceleration is a linear measurement (directly proportional to force), and gyroscopes measure rotation around an axis.
The good folks at MDN have an excellent explainer on how this all works on modern mobile browsers:

For our use case, we performed a few studies capturing the sensor data and the recorded video. From there, we determined thresholds for bounds on the acceleration and rotation quantities that resulted in videos of the highest quality. This approach works well on mobile devices since it allows monitoring of simple time-series numeric data as opposed to full camera frames, which require more memory and processing power to analyze.

Designing a motion monitoring algorithm
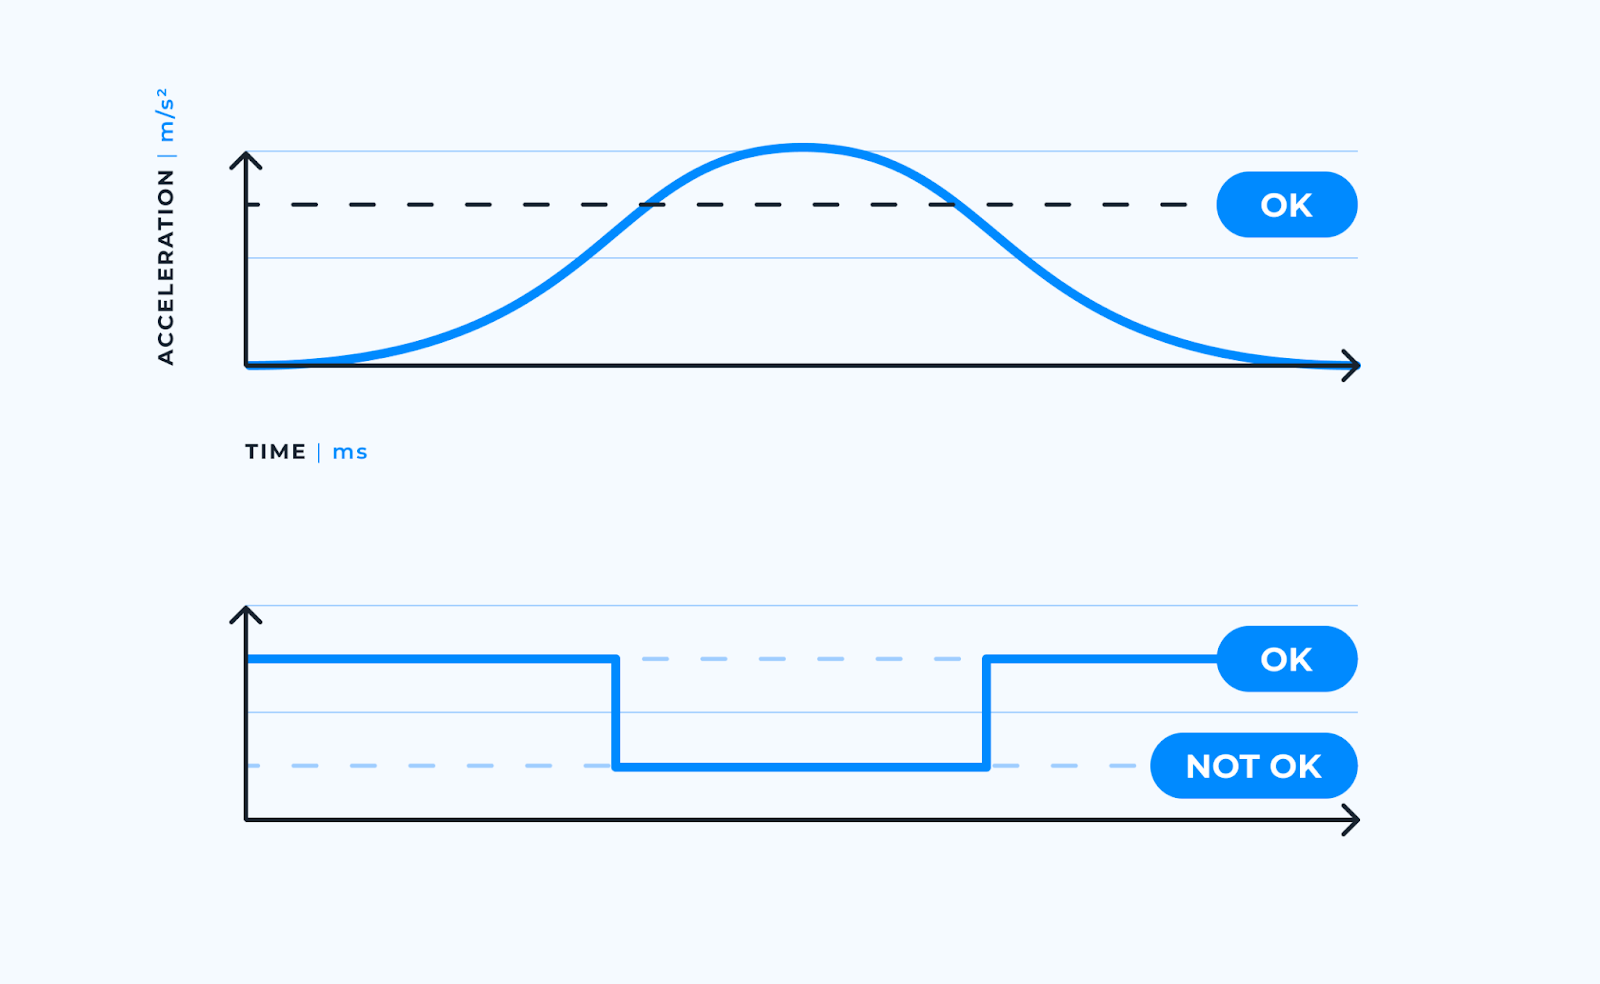
Consider a phone moving around in three-dimensional space. For this simple test, we'll measure the acceleration of the device along each axis, and then calculate the magnitude of the vector. The reasoning here is that excessive acceleration is undesirable in any direction - e.g., dropping the phone is just as bad as shaking side by side. We'll monitor the magnitude of this vector over time, and determine if the underlying motion is acceptable or not at each point in time.
Once we do that, a sample sensor data reading looks as follows:

Next, we'll apply a simple threshold on the magnitude of this vector. Any time the acceleration exceeds this threshold, the motion is "not ok". Otherwise it is "ok":
The sensor processing algorithm runs at real time, and most modern phones can provide new data points every ~10ms or so. As a result, we don't want a rickety processing algorithm that deems the result to be a failure if the transitions are shifted in time by a few milliseconds. So, we need to introduce a concept of hysteresis into our approach. Hysteresis will temporarily allow the algorithm to classify the motion as either ok or not for a window of time around the transitions. This approach provides some breathing room to the algorithm implementer.
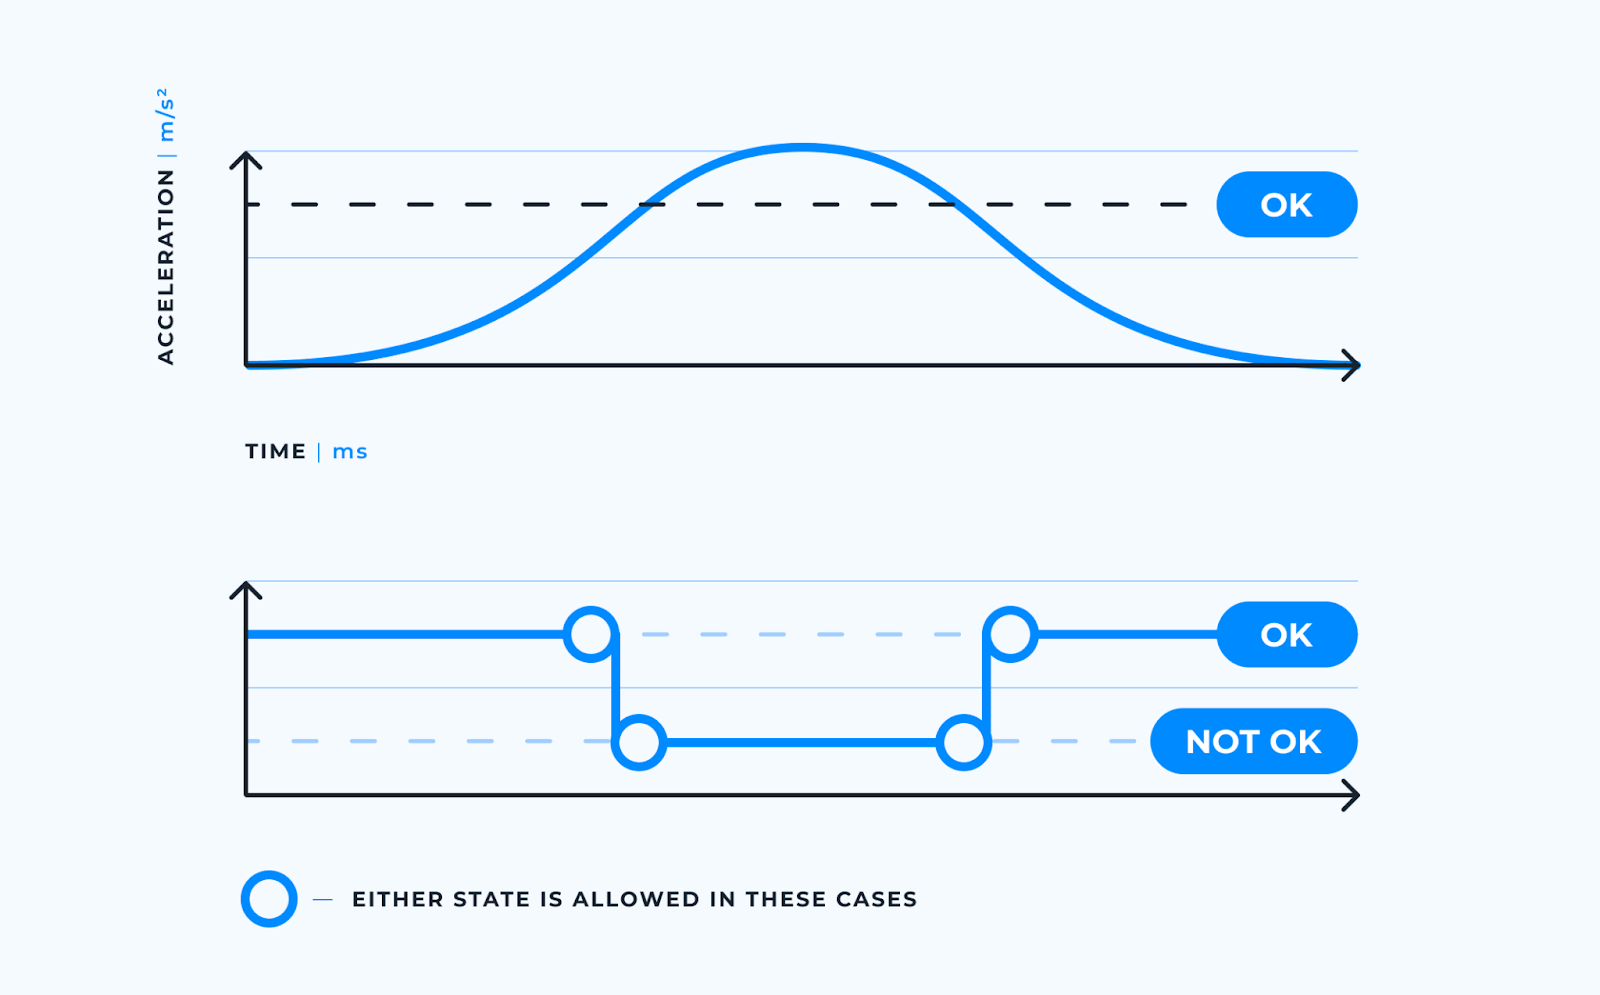
Using this approach, the following algorithms would be acceptable on the same input:
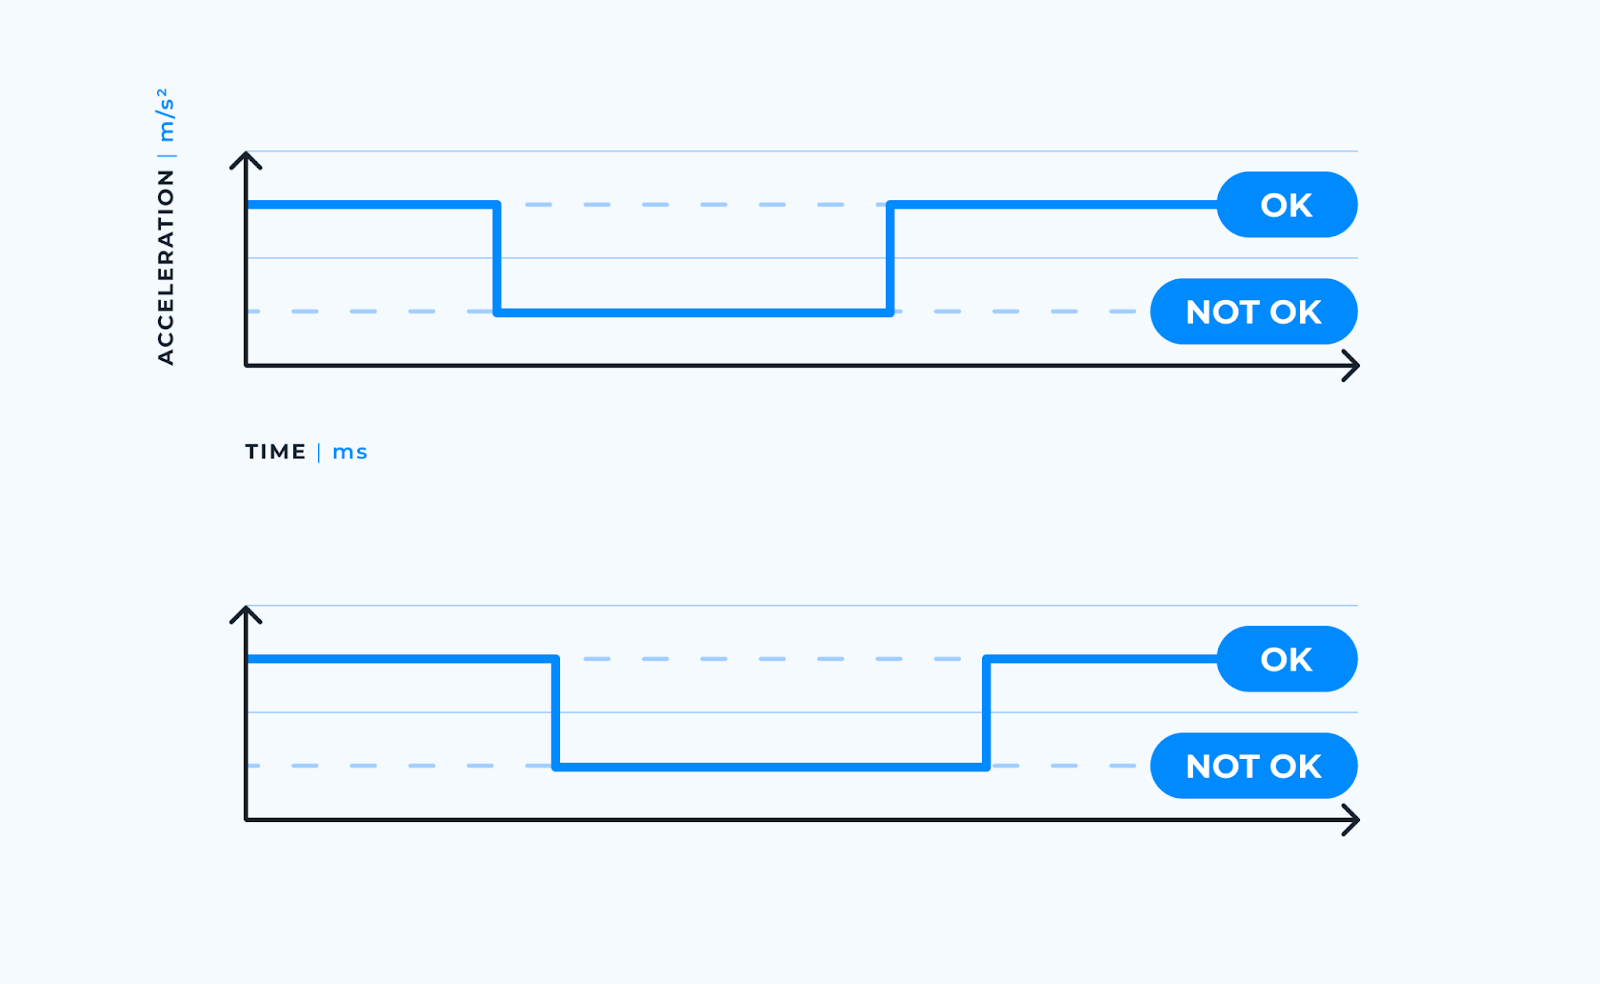
But an algorithm that deviates outside of the hysteresis window would not be acceptable:

Lastly, we'll apply a similar approach on the device's rotationRate, in addition to acceleration. The motion will be considered acceptable when both measurements are below the threshold.
Setting the test up in Cypress
Like most new and experimental browser features, using motion data in a production-grade application is not for the faint of heart. There are a few important hurdles to overcome:
- The rate the sensor data is provided varies per device, CPU load, what other apps are doing, etc. This means simple signal processing techniques like the Nyqiust-Shannon Theorem can be challenging to adhere to in this environment.
- Certain devices and hardware may not support all features. For example, the W3C spec provides leniency to lower-end devices that do not know how to subtract the effects of gravity out of the acceleration vector.
- Browsers are not consistent in how they provide access to the motion data. For example, Safari requires a permission prompt before it will grant access to motion data, while Chrome does not. On top of that, Chrome does not implement the permission prompt function, making it not only unnecessary, but unsupported to do the permission check on Chrome.
- Different browsers implement the coordinates differently, making a one-size-fits-all solution out of reach
At Yembo, we generally implement Cypress test cases to automatically test core functionality on each page every time a pull request is opened. Our philosophy for this is that we want to make it easy for engineers to experiment, iterate, and test new features. By making it easy to spot when something has broken, rapid development becomes less risky and the overall time it takes to ship new ideas is reduced.
We had initially relied on manual testing for our sensor processing algorithm due to these complexities. However, relying on manual testing places an inherent disincentive against changing the code. If changes are difficult to verify, engineers will be less likely to want to change them out of fear of breaking things. As a result, it's desirable to find a way to provide some level of test coverage on the UI capture tips.
As long as the motion detection features are experimental and vary across devices, we decided we'd still include manual testing as part of our process. That said, we can provide a substantial level of confidence with automated testing that allows for rapid iteration.
Testing it out
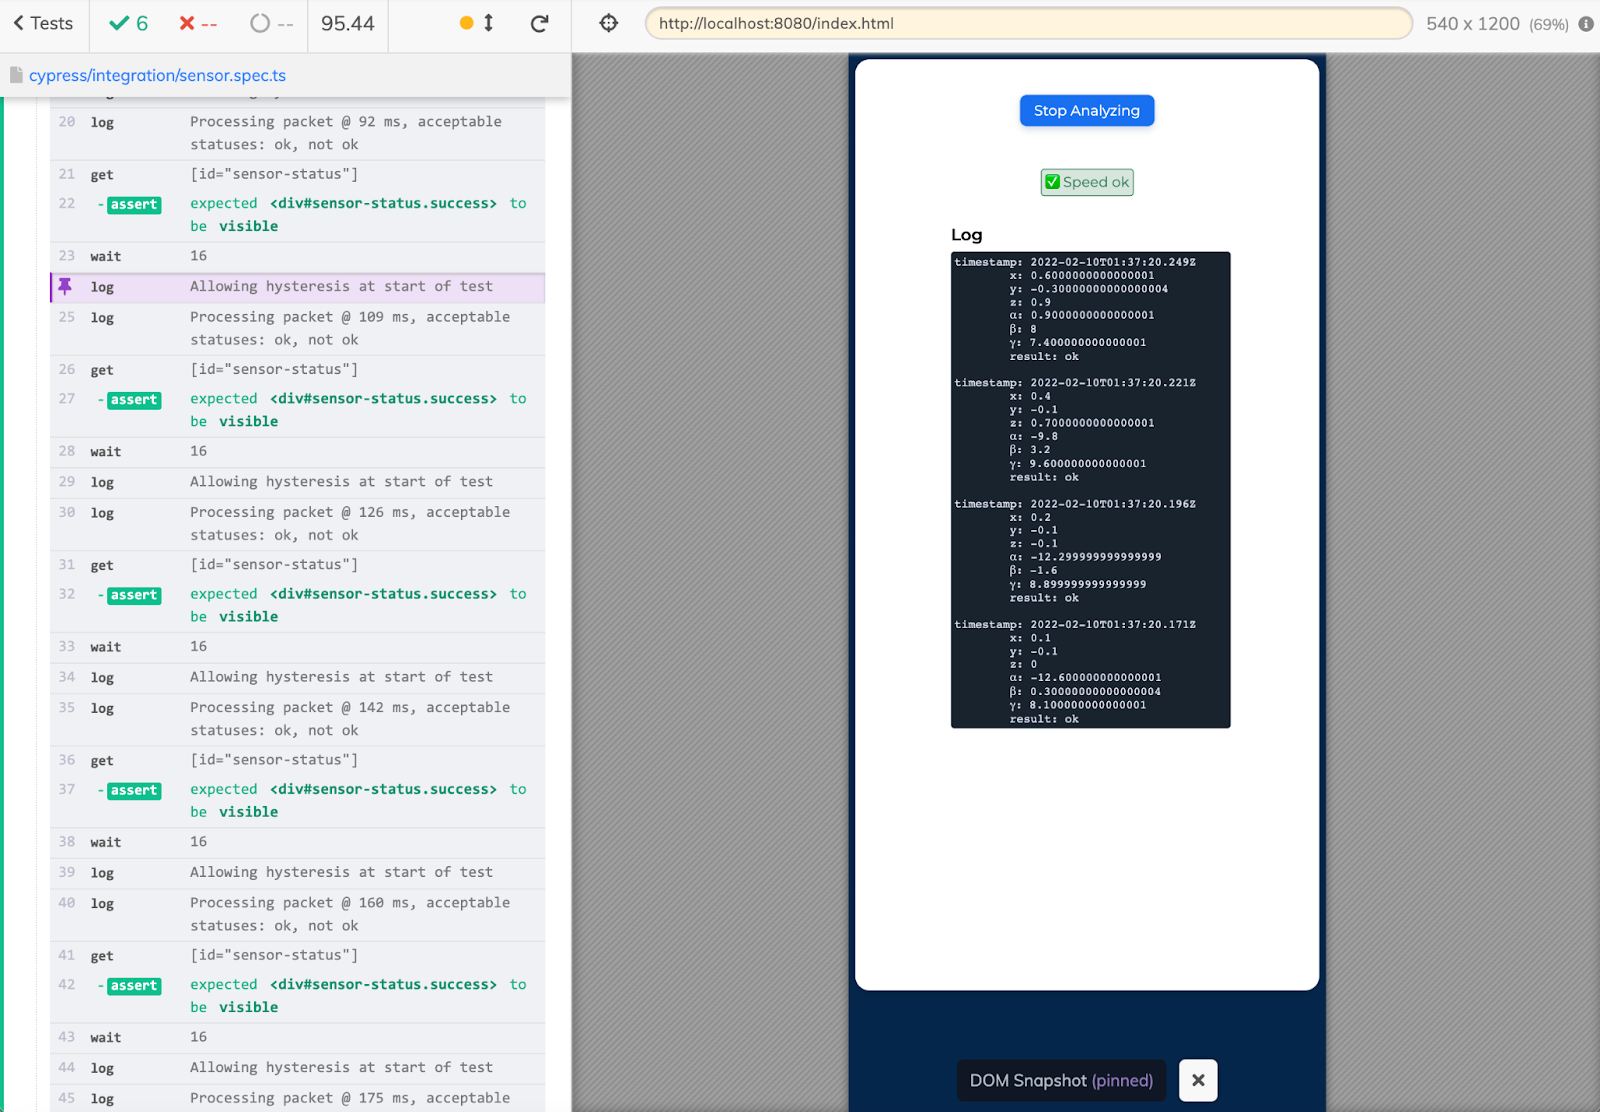
We put together a simple sample page (source) that you can test on your phone to monitor the motion data. We also put together a repo that brings the whole project together with working Cypress test cases.


Bringing it all together
To set up the tests, we wanted to make sure we were using realistic information during the automated Cypress tests. So, we recorded motion patterns on various devices and browsers and saved a log of the data in a JSON array in a test file. While recording, we annotated the timestamps through the recordings where the motion was acceptable and where it was too fast.
If you're following along in the sample project, you can record your own motion data from collect.html (the readme explains how to use it).
We configured Cypress to replace the real DeviceMotionEvent listener with a synthetic one, which allowed us to set up a framework where Cypress would replay the recorded data from the JSON file during the test. Since Cypress is not really running on a mobile device, the window never fires a device motion event even if an event listener is added. So we can call the event listener manually from Cypress via the window object to pass along synthetic motion events. This allows Cypress to simulate real motion data during the test.
Since we annotated the expected behavior for each test, the Cypress tests can be configured to expect the UI to indicate if the motion is acceptable or not by checking for simple DOM elements as the tests progress.
Now if we were to introduce a change to the algorithm that causes the UI to show acceptable motion as too fast or vice versa, we'd catch it automatically before the change is accepted into the main branch.
Tinker with confidence, fellow engineers. 🎉